Vegetable Knife

What are some time-saving tips for chopping vegetables quickly and efficiently ?
Chopping vegetables can be a time-consuming task, but with these tips, you can save time and make the process more efficient. Let's dive into some helpful techniques: Use a Sharp Knife: Maintain Your Knives by regularly using a honing steel or getting them professionally sharpened. Use the right knife for the job. For example, use a chef's knife for larger vegetables and a paring knife for smaller ones. Peel Smart: Not All Vegetables Need Peeling. Some vegetables, like carrots and potatoes, have edible skins that add nutrients and flavor. Only peel if necessary. Use a vegetable peeler for quick and even peeling, or for soft-skinned vegetables like tomatoes, a simple scoring and peeling method can be faster. Cut Once, Use Multiple Times: Prep Ahead of Time when you have time, prep extra vegetables and store them in airtight containers for future use. When cooking multiple dishes that use the same vegetable, chop all at once and divide as needed. Uniform Size Matters: Aim for uniform cuts so that vegetables cook evenly and look neat when plated. Take time to practice precise cutting; it will speed up your chopping in the long run. Use a Food Chopper or Mandoline: For large quantities, an electric food chopper can save significant time. A mandoline slicer quickly produces uniform slices or juliennes, especially useful for vegetables like cucumbers or potatoes. Clean As You Go: Keep your workspace tidy by cleaning your cutting board and utensils as you go to avoid clutter that can slow you down. Have a designated area for scraps and waste to keep your chopping area clear. Learn to Chop Properly: Watch tutorials or take a cooking class to learn proper chopping techniques, which can significantly improve speed and safety. Make sure you're holding your knife correctly; grip the handle towards the base for more control and force. Multitask with Safety: While it's good to multitask (like starting to boil water while chopping), ensure that you are not compromising safety by rushing or being distracted. Prepare other ingredients that don't require heat while vegetables are roasting or simmering. Work with Wet Knives: Keeping your knife wet with water can help slice through sticky or wet foods like fresh fruits more easily. If you need thin, uniform slices, dip your ruler in water before using it to measure thickness while slicing. Invest in Quality Tools: Invest in non-slip, durable cutting boards that are gentle on your knives. Consider investing in other kitchen tools like a garlic press, herb stripper, or apple slicer to speed up specific tasks.
How do I properly use a chef's knife in the kitchen ?
Using a chef's knife properly is essential for efficient and safe food preparation. Here are some tips on how to use a chef's knife correctly: Holding the Knife Correctly: Hold the handle firmly with your dominant hand, using a grip that feels comfortable and secure. Place your index finger and thumb on either side of the handle, with your other fingers curled around it. Keep your thumb tucked in towards the handle to avoid accidents. Chopping Technique: Maintain a slight angle (about 20 degrees) between the blade and the cutting board to make it easier to slice through tough ingredients. Use a rocking motion, pressing down on the blade at the end closest to the tip and then lifting at the handle end, to create a smooth chopping action. Slicing Technique: Start by drawing the blade back slightly before making the cut. As you push down on the blade, pull it towards you to make a long, even slice. Safety Tips: Sharpen your knife regularly as a sharp knife is safer than a dull one. Always keep your fingers out of the path of the blade to avoid accidents. Use a stable cutting board to protect your countertops and provide a safe surface for cutting. By following these guidelines, you can effectively and safely use a chef's knife in the kitchen. Remember to practice regularly to improve your skills and confidence with this versatile tool.
How do I make a bento box meal ?
How to make a bento box meal with rice, protein, vegetables, and garnishes. Includes steps for cooking rice, preparing protein, cutting vegetables, assembling the bento box, and packing it for later enjoyment.

What are some good options for quick and easy vegetarian meals ?
Vegetarian meals can be quick and easy to prepare. Here are some options: stir-fry vegetables with rice or noodles, quinoa salad with roasted vegetables, vegetable soup or broth, veggie burgers with avocado and salsa, and pasta with pesto and cherry tomatoes. These meals can be customized based on preferences and what's available in the kitchen.
How do I make sushi at home ?
Sushi is a popular Japanese dish that has gained worldwide popularity for its delicious taste and health benefits. Making sushi at home can be a fun and rewarding experience. Here are the steps to follow: Ingredients: - Sushi rice - Nori sheets - Fish fillets (salmon, tuna, or any other fish of your choice) - Vegetables (cucumber, avocado, carrots) - Soy sauce - Wasabi - Pickled ginger Tools: - Bamboo sushi mat - Rice cooker or pot - Sharp knife Steps: 1. Cook the sushi rice by rinsing it in cold water until the water runs clear, then cooking it with water in a pot until all the water has been absorbed. Mix the cooked rice with sushi vinegar using a wooden spoon. 2. Prepare the fish and vegetables by cutting them into thin slices and long, thin strips respectively. 3. Assemble the sushi rolls by placing a sheet of nori on top of the bamboo sushi mat, spreading a small handful of sushi rice evenly over the nori sheet leaving about an inch gap at the top, arranging the fish and vegetable slices on top of the rice, and rolling the sushi tightly using the bamboo mat. Wet the gap at the top of the nori sheet with water to seal the roll. 4. Cut the sushi rolls into bite-sized pieces using a sharp knife, wiping the knife with a damp cloth between each cut to prevent sticking. 5. Serve the sushi by arranging the pieces on a plate and serving with soy sauce, wasabi, and pickled ginger. Enjoy your homemade sushi!
How do I incorporate more fruits and vegetables into my daily meals ?
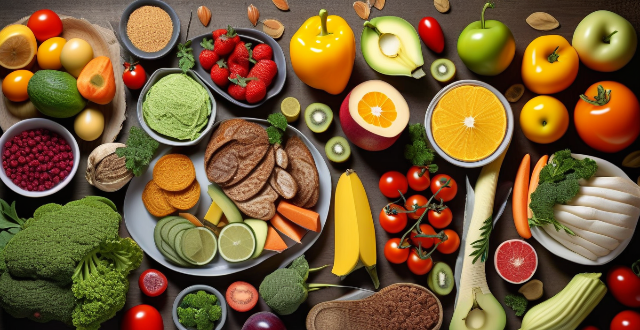
Incorporating more fruits and vegetables into daily meals is crucial for a balanced diet, providing essential nutrients. To achieve this, start the day with fruit smoothies or salads, snack on vegetable sticks or fruit parings, include veggies in lunch and dinner through salads, stir-fries, and soups, and enjoy fruit-based desserts or healthy cookies. Plan ahead, prep fruits and vegetables in advance, and cook in bulk to simplify the process.
What are some healthy Italian pasta dishes ?
Italian cuisine is known for its delicious pasta dishes, but not all of them are healthy. Here are some healthier options that you can try: 1. Whole Wheat Pasta with Tomato Sauce 2. Zucchini Noodles with Pesto 3. Spaghetti Squash with Marinara Sauce 4. Pasta Primavera 5. Grilled Vegetable Pasta Salad 6. Mushroom Stroganoff 7. Seafood Pasta 8. Caprese Pasta Salad 9. Eggplant Parmesan 10. Vegetable Lasagna
What are some easy and delicious vegetarian recipes for beginners ?
Vegetarianism is a popular dietary choice, but it can be daunting for beginners to find easy and delicious recipes. Here are some simple vegetarian dishes that are perfect for those new to plant-based eating: ## **1\. Roasted Vegetable Pasta** This colorful pasta dish is packed with flavor and nutrition. **Ingredients:** * 1 cup cherry tomatoes, halved * 1 zucchini, sliced * 1 red bell pepper, sliced * 1 yellow onion, chopped * 2 garlic cloves, minced * 8 oz whole wheat pasta * 2 tbsp olive oil * Salt and pepper to taste * Fresh basil leaves for garnish **Instructions:** 1. Preheat oven to 400°F (200°C). 2. Toss the vegetables in olive oil, salt, and pepper. 3. Arrange the vegetables on a baking sheet and roast for 25 minutes or until tender. 4. Cook the pasta according to package instructions. 5. In a large bowl, combine the roasted vegetables and cooked pasta. 6. Garnish with fresh basil leaves and serve warm. ## **2\. Chickpea Curry** This creamy and flavorful curry is perfect for beginners. **Ingredients:** * 1 can chickpeas, drained and rinsed * 1 onion, diced * 2 garlic cloves, minced * 1 tbsp curry powder * 1 tsp ground cumin * 1 tsp ground coriander * 1 tsp turmeric * 1 can coconut milk * Salt to taste **Instructions:** 1. Heat a pan over medium heat and add a tablespoon of oil. 2. Sauté the onion and garlic until soft. 3. Add the spices and cook for another minute. 4. Stir in the chickpeas and coconut milk. 5. Bring to a simmer and cook for 10 minutes or until the sauce thickens. 6. Season with salt and serve hot with rice or naan bread. ## **3\. Lentil Soup** Lentil soup is hearty, nutritious, and easy to make. **Ingredients:** * 1 cup green lentils, rinsed * 1 onion, diced * 2 garlic cloves, minced * 2 carrots, diced * 2 stalks celery, diced * 4 cups vegetable broth * 1 bay leaf * Salt and pepper to taste

What are the essential kitchen tools every home cook should have ?
The text provides a list of essential kitchen tools that every home cook should have, including a chef's knife, cutting board, measuring cups and spoons, mixing bowls, saucepan, skillet/frying pan, baking sheet/roasting pan, whisk, wooden spoon or spatula, can opener, garlic press, grater, peeler, tongs, and colander/strainer. These tools are important for preparing meals and ensuring accurate measurements and successful cooking.

How can I prepare a quick and tasty soup ?
In this text, the author provides a simple and quick recipe for preparing a tasty soup at home. They detail the ingredients needed, including olive oil, onion, garlic, carrots, celery, zucchini, vegetable broth, white beans, spinach, salt, pepper, and fresh herbs for garnish. The instructions are broken down into six steps: sautéing the vegetables, adding broth and beans, simmering, adding spinach, seasoning, and garnishing before serving. The author also offers tips for variations, adding protein, and spicing up the soup. Overall, the text emphasizes the versatility and nutritional value of soups while providing a straightforward recipe for a delicious homemade option.
How can I make sure my fruits and vegetables are organic ?
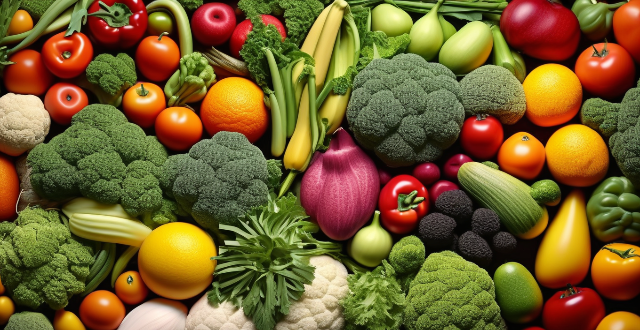
To ensure your fruits and vegetables are organic, buyTo ensure your fruits and vegetables are organic, buy stores, grow your own using avoid contamination by washing produce thoroughly, and educate yourself on the latest research and news about organic farming.
What is the best way to cook tempura batter ?
Tempura is a Japanese dish that originated in the late 16th century. It consists of seafood, vegetables, or other ingredients dipped in a wheat-flour batter and deep-fried. The key to perfect tempura lies in the preparation of the batter. Here are some tips on how to make the best tempura batter: Ingredients: - Vidalia Onions - These sweet onions are low in sulfuric compounds, which makes them easier to digest. They also have a lower fiber content than yellow or white onions, making them less likely to cause gas or bloating. - Garlic - Garlic is rich in antioxidants and has anti-inflammatory properties. It's also known for its immune-boosting benefits. - Ginger - Ginger has been used for centuries as a natural remedy for digestive issues. It can help relieve nausea and vomiting, reduce gas and bloating, and even alleviate symptoms of acid reflux. - Chicken Broth - Chicken broth is an excellent source of minerals like calcium, magnesium, and potassium. It also contains collagen, which is great for gut health. - Bone Broth - Bone broth is rich in amino acids like glycine and proline, which can help repair the gut lining and reduce inflammation. - Coconut Oil - Coconut oil contains medium-chain triglycerides (MCTs), which are easily digested and can provide quick energy for the body. It also has antimicrobial properties that can help support gut health. Preparation: 1. Chop your chosen vegetables into small pieces. This will ensure that they cook evenly and absorb the flavors of the broth. 2. In a large pot, heat up some coconut oil over medium heat. Add the chopped onions, garlic, and ginger, and sauté until they become fragrant and slightly softened. 3. Pour in the chicken broth and bone broth, then bring everything to a boil. 4. Once the broth is boiling, add in your chopped vegetables. Stir everything together so that the vegetables are fully submerged in the liquid. 5. Add salt, pepper, and any other desired seasonings to taste. Consider adding herbs like thyme or rosemary for additional flavor. 6. Reduce the heat to low and let the soup simmer for at least 30 minutes, or until the vegetables are tender and fully cooked through. 7. Ladle the hot soup into bowls and serve immediately. Enjoy the warmth and comfort of this delicious and gut-friendly vegetable soup!
What are some simple changes I can make to live a zero-waste lifestyle ?
Living a zero-waste lifestyle is about reducing the amount of waste we produce and finding ways to reuse, recycle, or compost what we can't avoid. Here are some simple changes you can make to live a more sustainable and eco-friendly life: 1. Bring Your Own Bags: Always carry a reusable bag with you when you go shopping. This will help you avoid using plastic bags that end up in landfills or oceans. You can also use them for carrying other items like books, gym clothes, etc. 2. Use Reusable Water Bottles: Instead of buying bottled water, invest in a good quality reusable water bottle. This will not only save you money but also reduce the number of plastic bottles that end up in landfills. 3. Carry Reusable Cutlery: Carry a set of reusable cutlery (fork, spoon, knife) with you. This will help you avoid using disposable plastic utensils when eating out or getting takeout food. 4. Buy Bulk Foods: Buying bulk foods reduces packaging waste as you can bring your own containers to fill up on grains, nuts, spices, and other pantry staples. This also helps you save money in the long run. 5. Compost: Start composting at home by collecting organic waste like fruit and vegetable scraps, coffee grounds, and eggshells. This will reduce the amount of garbage you produce and create nutrient-rich soil for your garden or plants. 6. Choose Secondhand Goods: Consider buying secondhand goods instead of new ones. This includes clothing, furniture, electronics, and even cars. Buying used items reduces demand for new products and their associated environmental impacts. 7. Reduce Energy Consumption: Make small changes like turning off lights when not needed, unplugging chargers and appliances when not in use, and using energy-efficient light bulbs. These actions can significantly reduce your energy consumption and lower your carbon footprint. 8. Support Local Farmers: Buy locally grown produce from farmers' markets or join a community-supported agriculture program. Supporting local farmers reduces transportation emissions and ensures that your food is fresher and hasn't traveled far distances. 9. Avoid Single-Use Products: Try to avoid single-use products like paper towels, disposable razors, and plastic straws. Instead, opt for reusable alternatives like cloth towels, safety razors, and stainless steel or bamboo straws. 10. Educate Yourself: Continuously educate yourself about sustainable living practices and share your knowledge with others. The more people adopt these practices, the greater impact we can have on reducing waste and preserving our planet for future generations.
What are some must-have kitchen gadgets for healthy eating ?
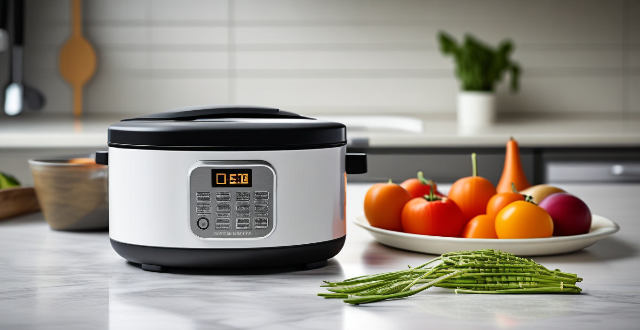
In pursuit of healthy eating, having the right kitchen gadgets can significantly improve the preparation and enjoyment of nutritious meals. This article lists essential tools such as a high-quality chef's knife for efficient chopping, a food processor for versatile cooking tasks, a steamer basket for nutrient-rich cooking, and other devices like slow cookers, spiralizers, and immersion blenders that facilitate healthy meal preparation. Each device is discussed in terms of its benefits, uses, and why it is considered essential for healthy cooking. By incorporating these tools into your kitchen setup, you can make preparing healthy meals easier and more enjoyable, setting the foundation for a lifetime of healthy eating habits.
What are some go-to vegetarian or vegan home-cooked options ?
Vegetarian and vegan home-cooked options are not only delicious but also healthy and environmentally friendly. Here are some go-to vegetarian or vegan home-cooked options: 1. Lentil Soup: A hearty and nutritious option for vegetarians and vegans. It is easy to make and can be customized with different vegetables and spices. 2. Chickpea Curry: A flavorful and filling dish that is perfect for vegetarians and vegans. It is made with chickpeas, vegetables, and spices. 3. Quinoa Salad: A healthy and versatile option for vegetarians and vegans. It can be made with different vegetables and dressings.

Can you provide a step-by-step guide for making bread at home ?
This step-by-step guide provides a comprehensive process for making bread at home, detailing the ingredients and tools required, as well as each stage of the bread-making process from proofing the yeast to baking. It emphasizes the importance of technique in kneading and rising, offers optional tips for enhancing texture, and concludes with instructions on how to bake and enjoy the homemade bread.

How can I repair a hole in the wall without professional help ?
Repairing a hole in the wall can be done without professional help with the right tools and techniques. This step-by-step guide includes materials needed, cleaning and prepping the area, applying spackling paste, sanding the area, applying primer, painting the area, removing tape and cleaning up. Following these simple steps will result in a successfully repaired hole in the wall.
What tools do I need for basic home repairs ?
Basic Home Repairs Toolkit: Essential Tools for Common Household Tasks When it comes to basic home repairs, having the right tools is essential. Here are some of the most important tools you should have on hand for common household tasks: 1. Screwdrivers: Flathead and Phillips head screwdrivers for general use and assembling furniture. 2. Pliers: Needle-nose and slip-joint pliers for gripping and bending wires and cutting and gripping various materials. 3. Wrenches: Adjustable wrench and crescent wrench set for tightening and loosening nuts and bolts of various sizes. 4. Hammer: Claw hammer for driving nails and removing them from wood. 5. Tape Measure: Retractable tape measure for measuring distances and ensuring accuracy in cuts and installations. 6. Level: Torpedo level and carpenter's square for checking if objects are horizontally level and angles are square and true. 7. Handsaw: Hacksaw and keyhole saw for cutting through metal, plastic, or wood and making small, precise cuts in drywall or wood. 8. Drill/Driver: Cordless drill/driver with assorted drill bits and screw tips for drilling holes and driving screws into various materials. 9. Staple Gun: Manual staple gun for upholstery, fabric, and light duty fastening tasks, and electric staple gun for heavy-duty fastening tasks like installing flooring or ceiling tiles. 10. Utility Knife: Retractable utility knife for cutting open boxes, trimming materials, or scoring surfaces before snapping them apart. By having these basic tools on hand, you can tackle many common home repair projects with confidence and efficiency. Remember to keep your tools organized, clean, and properly maintained for safe and effective use.

Can you suggest any budget-friendly dinner recipes that don't compromise on taste ?
Budget-friendly dinner recipes include spaghetti aglio e olio, vegetable stir fry, chickpea curry, and lentil soup. These dishes are easy to make with simple ingredients and won't break the bank.
Can you teach me how to decorate a cake like a professional ?
Decorating a cake like a professional requires creativity, skill, and attention to detail. Here are steps and tips to create a stunning cake that looks like it came from a bakery: - Materials needed include a freshly baked and cooled cake, buttercream frosting, piping bags and tips, spatula or offset knife, turntable (optional), and edible decorations. - Level the cake by using a serrated knife to create a flat surface for stacking and decorating. - Apply a thin layer of buttercream frosting over the entire cake to seal in crumbs and create a smooth base for additional layers of frosting. Chill the cake for about 30 minutes to set the crumb coat. - Once the crumb coat is set, apply a thicker layer of buttercream frosting all over the cake, achieving a smooth finish using an offset spatula or bench scraper. If desired, use a turntable for easier maneuvering. - Mix food coloring into your buttercream frosting to achieve your desired shade(s). You can also add flavor extracts such as vanilla, almond, or lemon to enhance the taste of your frosting. - Fit piping bags with different tips (star, round, petal, etc.) and fill them with colored buttercream frosting. Practice making swirls and patterns on parchment paper before applying them to the cake. Start from the center and work your way outward using even pressure and consistent motions. - Incorporate edible decorations such as fresh fruit slices, chopped nuts, chocolate shavings, or other edible decorations on top of the cake and around the sides. Use small dabs of frosting to secure larger items in place. - Add borders and details using smaller piping tips around the edges of the cake or within specific areas to define different sections and add visual interest. - Finally, add any remaining finishing touches such as writing messages with piping gel or adding sugar pearls as accents. Step back and admire your beautiful creation!

What is the easiest way to patch a small hole in the ceiling ?
Patching a small hole in the ceiling is a straightforward DIY project that requires basic tools and materials. To begin, clean the area around the hole with a damp cloth to ensure proper adhesion of the spackling compound. Apply a small amount of spackling compound to the hole using a putty knife or spatula, spreading it evenly over the hole and slightly beyond its edges. Allow the compound to dry completely according to the manufacturer's instructions, then sand the area until it is level with the surrounding ceiling surface. Apply a coat of primer paint to the patched area, followed by a coat of ceiling paint that matches your existing ceiling color. Work in a well-ventilated area, use a ladder or step stool for safety, and consider hiring a professional if you are unsure about your ability to repair the hole.
What are the most popular vegetarian dinner recipes ?
Vegetarian dinner recipes have become increasingly popular in recent years as people are looking for healthier and more sustainable food options. Here are some of the most popular vegetarian dinner recipes: 1. Lentil Soup: A hearty and filling meal that is perfect for colder months, packed with protein, fiber, and nutrients. 2. Chickpea Curry: A flavorful and satisfying dish that is easy to make, perfect for those who love Indian cuisine. 3. Roasted Vegetable Quinoa Bowl: A healthy and colorful meal that is perfect for meal prep, packed with vegetables, protein, and fiber.
What are the essential items to bring for a scuba diving or snorkeling trip ?
When planning a scuba diving or snorkeling trip, it's important to be prepared with the right gear and equipment. Here are some essential items to consider bringing: ## Scuba Diving ### Personal Gear - **Wetsuit or Drysuit**: Depending on the water temperature, you may need a wetsuit or drysuit to keep warm. - **Fins, Mask, and Regulator**: These are the basic pieces of scuba equipment that you'll need for each dive. - **Dive Computer**: A dive computer helps you track your depth, time, and nitrogen levels. - **Buoyancy Control Device (BCD)**: A BCD helps you adjust your buoyancy underwater. - **Dive Watch**: A watch with a timer function can help you keep track of your dive time. - **Dive Light**: A dive light is useful for exploring underwater caves or for night dives. - **Dive Knife**: A dive knife can be used for safety purposes or to cut through fishing line or nets. - **Dive Boots**: Dive boots protect your feet from sharp rocks and coral. - **Dive Gloves**: Dive gloves protect your hands from cold temperatures and abrasions. ### Safety Equipment - **First Aid Kit**: A first aid kit should include items such as bandages, antiseptic wipes, and pain relievers. - **Signal Whistle**: A signal whistle can be used to attract attention if you need assistance. - **Surface Marker Buoy (SMB)**: An SMB can be deployed to mark your position on the surface while you're underwater. - **Dive Flag**: A dive flag alerts boaters and other water users that there are divers in the area. - **Oxygen Boost**: An oxygen boost can be used in case of decompression sickness. ## Snorkeling ### Personal Gear - **Snorkeling Mask**: A well-fitting mask is essential for clear vision underwater. - **Snorkeling Fins**: Fins help you move more efficiently through the water. - **Snorkeling Vest**: A snorkeling vest provides added buoyancy and comfort while swimming. - **Sun Protection**: Sunscreen, sunglasses, and a hat are important for protecting your skin and eyes from the sun's harmful rays. - **Waterproof Camera**: A waterproof camera allows you to capture memories of your underwater adventures. - **Rash Guard**: A rash guard provides an extra layer of protection against the sun and abrasions. - **Dry Bag**: A dry bag can be used to store your belongings while you're in the water. ### Safety Equipment - **Life Jacket**: A life jacket is important for staying afloat if you become tired or encounter rough waters. - **Whistle**: A whistle can be used to attract attention if you need assistance. - **Water Shoes**: Water shoes provide protection for your feet while walking on rocky or slippery surfaces. - **Floatation Device**: A floatation device such as a pool noodle or kickboard can be used for added stability and support while swimming.